How to Dial in Your Welder: Finding the Sweet Spot
Your welder's got more dials than a spaceship, and if you don't know what they do, you're just guessing. Stop guessing and start laying down perfect beads.
Getting your machine dialed in is the absolute foundation of good welding. It doesn't matter how perfect your travel speed or work angle is if your voltage is off or your amperage is too low. Bad settings lead to weak welds, ugly beads, and a whole lot of frustration.
MIG: The Voltage & Wire Speed Dance
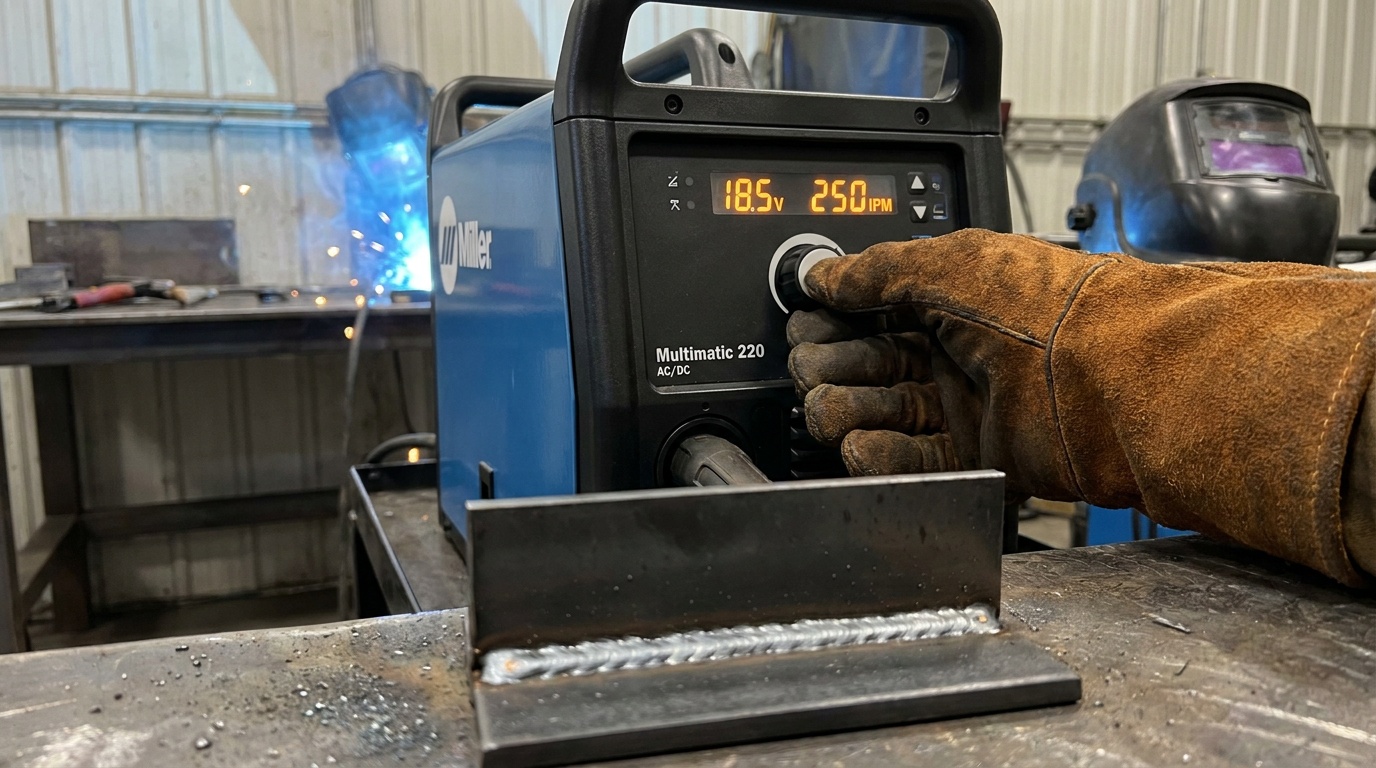
MIG welding is a balancing act between voltage and wire feed speed (WFS). Voltage controls the arc length and width of the bead, while WFS controls how much filler metal you're putting into the joint. Too much voltage, and you'll get a flat, wide bead or burn through thin stuff.
Too little voltage, and your arc will sputter, creating a tall, ropey bead with poor fusion. Your WFS needs to match that voltage. If WFS is too high for your voltage, the wire will stub into the puddle. Too low, and your arc will get long and sputtery.
Always start with your machine's recommended settings chart for your material thickness and gas, like the ones you'll find on your Miller or Lincoln Electric machine. For 1/8" mild steel with C25 gas, I often start around 18-19V and 200-220 IPM. Then, fine-tune on a piece of scrap until that arc sounds like bacon frying.
Stick: Amperage is King
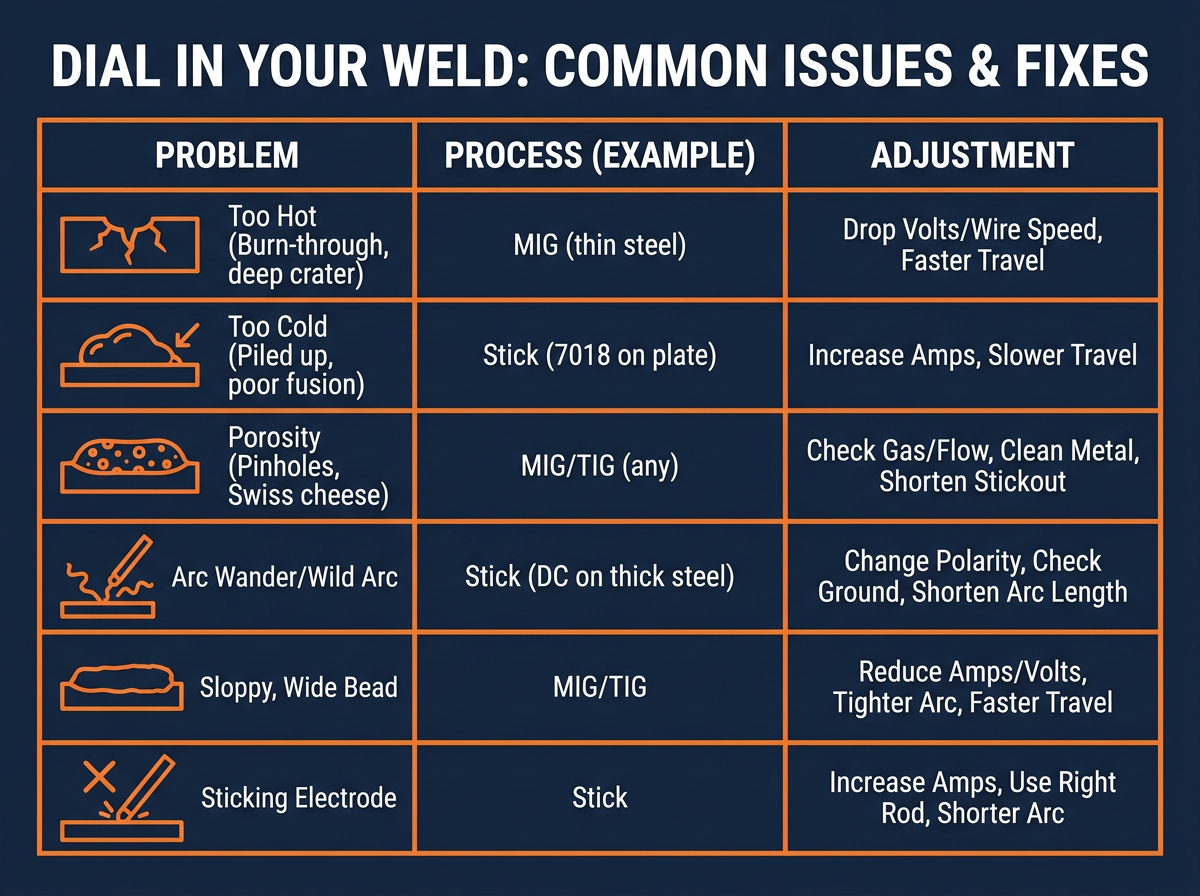
Stick welding is simpler in terms of settings: it's mostly about amperage. The right amperage depends on your rod type, diameter, and the thickness of your base metal. A 3/32" 6011 rod might run great at 70-90 amps, but a 1/8" 7018 needs more like 110-140 amps.
Too much amperage, and your rod will overheat, the puddle will be soupy, and you'll struggle with control, potentially blowing through. Too little, and you'll be sticking the rod constantly, getting poor penetration and a cold, lumpy weld. Your arc will be unstable and hard to maintain.
Check the rod manufacturer's recommendations printed right on the box. Don't just guess. For overhead or vertical welds, you might drop your amperage by 10-15 amps compared to flat positions to give yourself more control over the puddle.
TIG: Precision with Amperage and the Pedal
TIG welding gives you the most precise control over heat input, thanks to the foot pedal or torch-mounted control. You set a maximum amperage on the machine, but your foot pedal lets you vary that from zero up to your max. This is critical for starting, stopping, and dealing with heat buildup.
For mild steel, you'll use DC (Direct Current), and for aluminum, AC (Alternating Current). A good rule of thumb for steel is 1 amp per 0.001" of material thickness. So, for 1/8" (0.125") steel, start around 125 amps. With aluminum, you'll need more heat, sometimes 25-50% higher amperage than steel.
The key is to start with enough amperage to quickly establish a puddle, then back off with the pedal to manage the heat. If your puddle is taking too long to form, your max amperage is too low. If it's instantly blowing through or turning into a molten mess, you're too high.
Listen to Your Arc, Watch Your Puddle
Beyond the numbers, your senses are your best tools. A good MIG arc sounds like a sizzling, frying bacon. A bad one sputters, pops, or hums unevenly. With TIG, watch the puddle: it should be clean, molten, and flow smoothly. If it's sluggish or boiling, something's off.
The shape of your puddle also tells a story. A good puddle is consistently wet and shiny, spreading evenly. If it's piled high and narrow, you're too cold or moving too fast. If it's too wide and flat, you might be too hot or moving too slow.
Common Mistakes When Setting Your Welder
- Ignoring the Manufacturer's Chart: Those stickers inside your Hobart door or in the manual aren't suggestions; they're starting points.
- Not Testing on Scrap: Never jump straight to your project piece. Always run a test bead on a piece of scrap metal that matches your actual material.
- Changing Too Many Things at Once: If your weld looks bad, don't adjust voltage, WFS, and gas flow all at once. Change one variable, test, then adjust again.
- Assuming One Setting Fits All: Different material thicknesses, joint types, and even welding positions require different settings.
- Dirty Metal: No matter how perfect your settings, dirty or rusty metal will give you porosity and bad fusion. Clean it first!
Mastering your welder's settings takes practice, but it's the most important step to getting strong, clean welds every single time. Take the time to understand your machine, and you'll stop fighting your arc and start laying down professional-looking beads.
Quinn "The Welder" Morrissette
Join 30,000+ students learning to weld at home with my online course:
>>> Check out 1 Day Welder here
>>> Shop the 1 Day Welder Amazon Store