How to Identify Common Metals for Welding
Your welder isn't broken. Your metal might be.
Ever tried to lay down a perfect bead only to have it sputter, spit, and look like a bird's nest? Chances are, you didn't know what you were actually welding. That mystery metal is probably fighting you every step of the way.
Every metal has its own personality. Mild steel welds differently than aluminum, and stainless demands a whole other approach. Trying to force a MIG setup for mild steel onto a piece of cast iron is a guaranteed headache and a waste of good wire. Knowing your material means picking the right process, filler, gas, and settings, saving you time, frustration, and wasted metal before you even strike an arc.
The Spark Test – Your Grinder's Secret Weapon
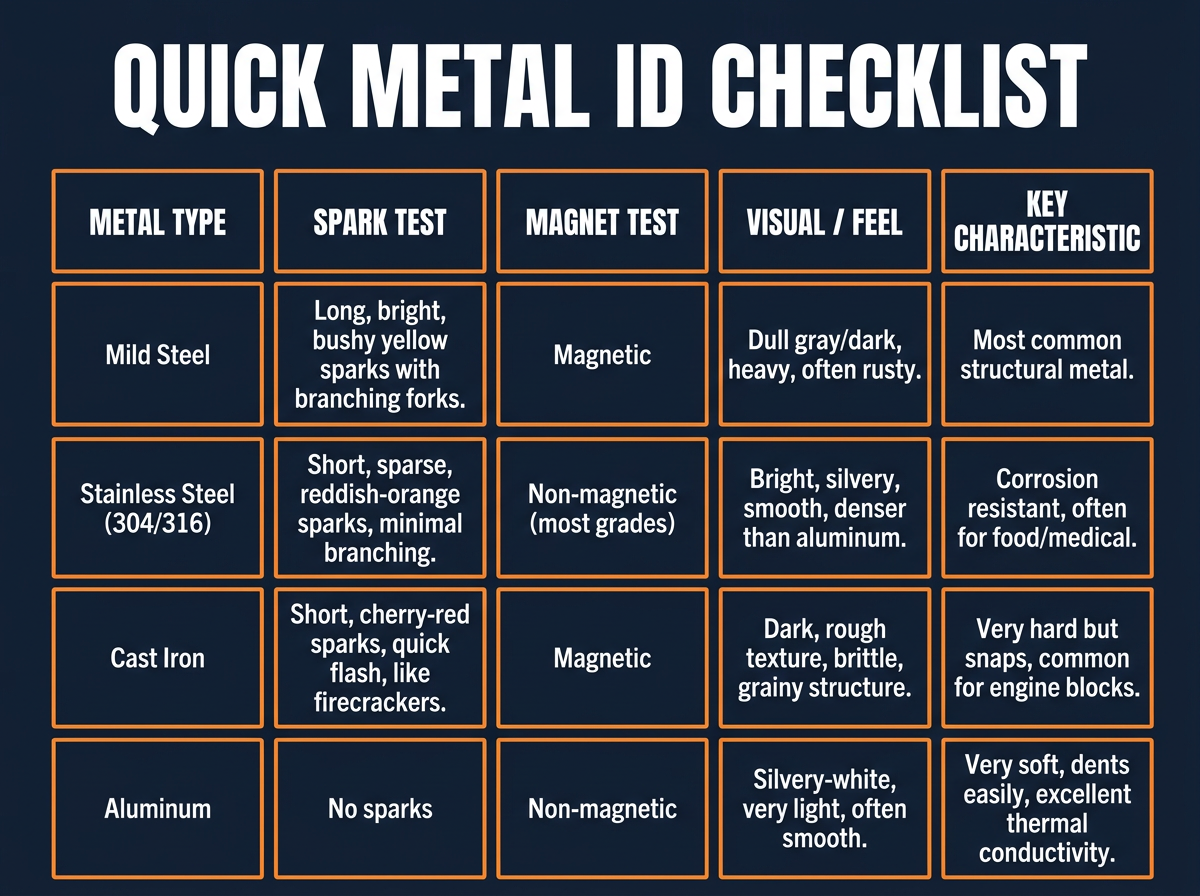
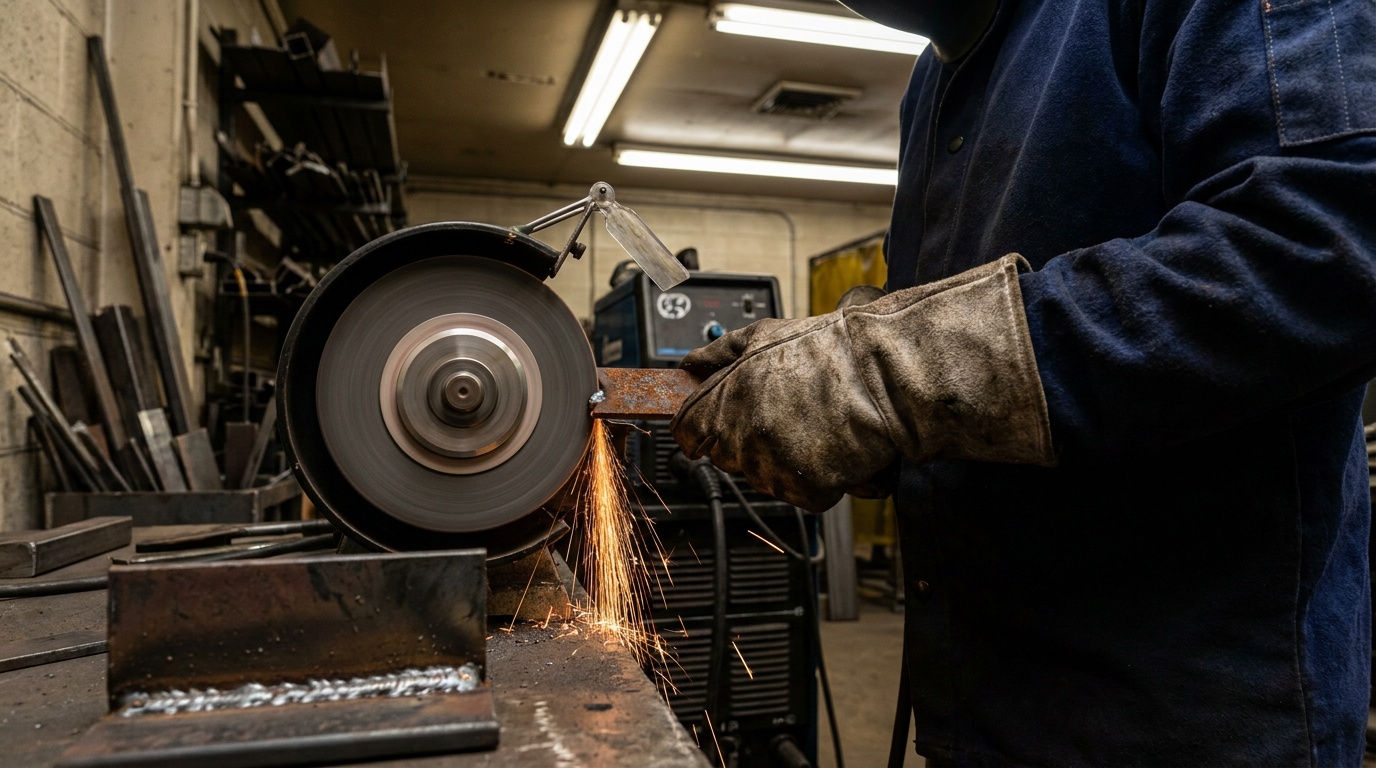
Grab a grinder, some safety glasses, and a piece of the mystery metal. Briefly touch the metal to the grinding wheel, just enough to generate some sparks. Now, watch them closely – they're telling you a story.
Mild steel throws off long, bright, bushy yellow sparks with distinct branching "forks" at the ends. It's an unmistakable, energetic show. Stainless steel (like common 304 or 316 grades) gives off much shorter, sparser, reddish-orange sparks, often with minimal branching, almost like tiny dull streaks. Cast iron? You'll see short, cherry-red sparks that pop and die out quickly, resembling tiny firecrackers. And if you've got aluminum or copper, forget it – you'll get no sparks at all. This simple test tells you a ton without touching your welder.
The Magnet Test – Quick & Dirty Attraction
This one's dead simple and quick. Grab any magnet you have lying around – a fridge magnet works, but a strong rare-earth magnet is even better for clearer results.
Mild steel and cast iron are almost always magnetic. Stick that magnet on, and it'll grab hold like a bulldog. Aluminum, copper, and most common grades of stainless steel (the austenitic ones like 304 and 316) are non-magnetic. If your magnet slides right off, you've likely got aluminum or non-magnetic stainless. Just remember, some exotic stainless grades or work-hardened stainless *can* be slightly magnetic, but for everyday welding and beginners, this test is a solid starting point.
Visual & Weight Inspection – Use Your Eyes (and Hands)
Look closely at the metal. Really examine its surface, color, and texture. Mild steel usually has a dull gray or dark surface, often with some surface rust or a mill scale coating. It feels substantial and heavy for its size. Aluminum is typically silvery-white, much lighter than steel for the same volume, and often has a smoother, almost polished look, especially if it's new stock from a supplier like Alro Steel or Speedy Metals.
Cast iron is usually dark gray to black, often rough-textured, and very brittle – you can sometimes even see a grainy, crystalline structure if it's a broken piece. Stainless steel often has a brighter, shinier, more silvery appearance than mild steel and feels denser than aluminum. Pick it up. Does it feel heavy or surprisingly light for its size? Your hands know more about density than you might think.
The File/Chisel Test – Hardness and Brittleness
Take a sharp file or even a center punch to an inconspicuous spot on the metal. Try to scratch or indent the surface. Mild steel will scratch, but it's not super soft – it offers some resistance. Aluminum will scratch easily and cleanly, often leaving a bright streak, confirming its softness.
Cast iron is hard but distinctively brittle. If you try to bend a thin piece, it'll likely snap clean instead of bending or deforming plastically. A chisel might chip it rather than cut into it smoothly, revealing its coarse grain structure. This test gives you a feel for the material's mechanical properties, which directly impacts how it behaves under the arc and what kind of post-weld stress it can handle.
The "What Is It Supposed To Be?" Test – Context Matters
Sometimes the best identification tool is simply common sense and context. What was the part originally? Is it a fence post (probably mild steel)? An engine block (likely cast iron or aluminum)? A a exhaust pipe or a kitchen counter frame (possibly stainless steel)?
Knowing the typical applications for different metals helps narrow down the possibilities fast. If you're welding up a custom intake for a race car, it's probably aluminum because of its strength-to-weight ratio. If you're repairing a broken vise jaw, it's almost certainly cast iron due to its hardness and wear resistance. Use the context and its intended purpose to guide your other, more definitive tests.
Common Mistakes
- Assuming everything is mild steel: This is the biggest trap for beginners. Most learn on mild steel, then get frustrated when other metals don't act the same. Don't skip the ID step – it's fundamental.
- Not cleaning off coatings: Paint, heavy rust, or plating (like galvanized steel) can hide the true metal and cause toxic fumes, terrible welds, or both. Always clean it down to bare metal before testing or welding.
- Ignoring the material's history: A random piece of scrap metal from a junk pile or construction site could be anything. Don't assume you know what it is just because it looks like steel. Test it.
- Trusting surface appearance alone: Some metals can look deceptively similar, especially when dirty, painted, or aged. Always combine a few tests – like a spark test and a magnet test – for reliable identification.
Stop Guessing, Start Knowing
Learning to identify your metals is as crucial as setting your amperage or picking the right filler rod. It's not just about avoiding bad welds and wasted materials; it's about staying safe, efficient, and producing quality work every time. Take the extra minute to figure out what you're working with, and you'll see your welding skills jump to the next level. Stop guessing, start knowing, and start laying down those perfect beads.
Quinn "The Metal Detective" Morrissette
Join 30,000+ students learning to weld at home with my online course:
>>> Check out 1 Day Welder here
>>> Shop the 1 Day Welder Amazon Store