How to MIG Weld Thin Sheet Metal Without Blowing Through It
Thin sheet metal is unforgiving. You pull the trigger for half a second too long and there's a hole where your weld used to be. Then you try to fill the hole. The hole gets bigger. You keep going. Now you're patching car quarter panels with washers.
Been there. It's a rite of passage.
Here's the thing — burn-through isn't about skill. It's about heat. Dial in the heat and the metal will stop fighting you.
Why Thin Metal Melts Faster Than You Think
Anything 18-gauge or thinner (roughly 1.2mm and below) has almost no thermal mass. The heat from your arc has nowhere to go. It just builds up and eats through the panel.
Thicker steel acts like a heat sink — it pulls energy away from the puddle. Sheet metal doesn't. So your settings and your technique both need to change.
Dial Your Machine Way Down
Most beginners set the machine too hot. Here's a starting point:
- 24-gauge (0.6mm): 30–40 amps, 0.023" wire
- 20-gauge (0.9mm): 40–55 amps, 0.023" wire
- 18-gauge (1.2mm): 55–75 amps, 0.030" wire
- 16-gauge (1.5mm): 75–90 amps, 0.030" wire
Use 75/25 argon/CO2 gas. Pure CO2 runs hotter and more aggressive — fine for thick stuff, brutal on sheet.
Run a smaller wire diameter than you think you need. 0.023" carries less current and melts smoother. If you only have 0.030" on the spool, you can still do it. You'll just need to move faster and stop sooner.
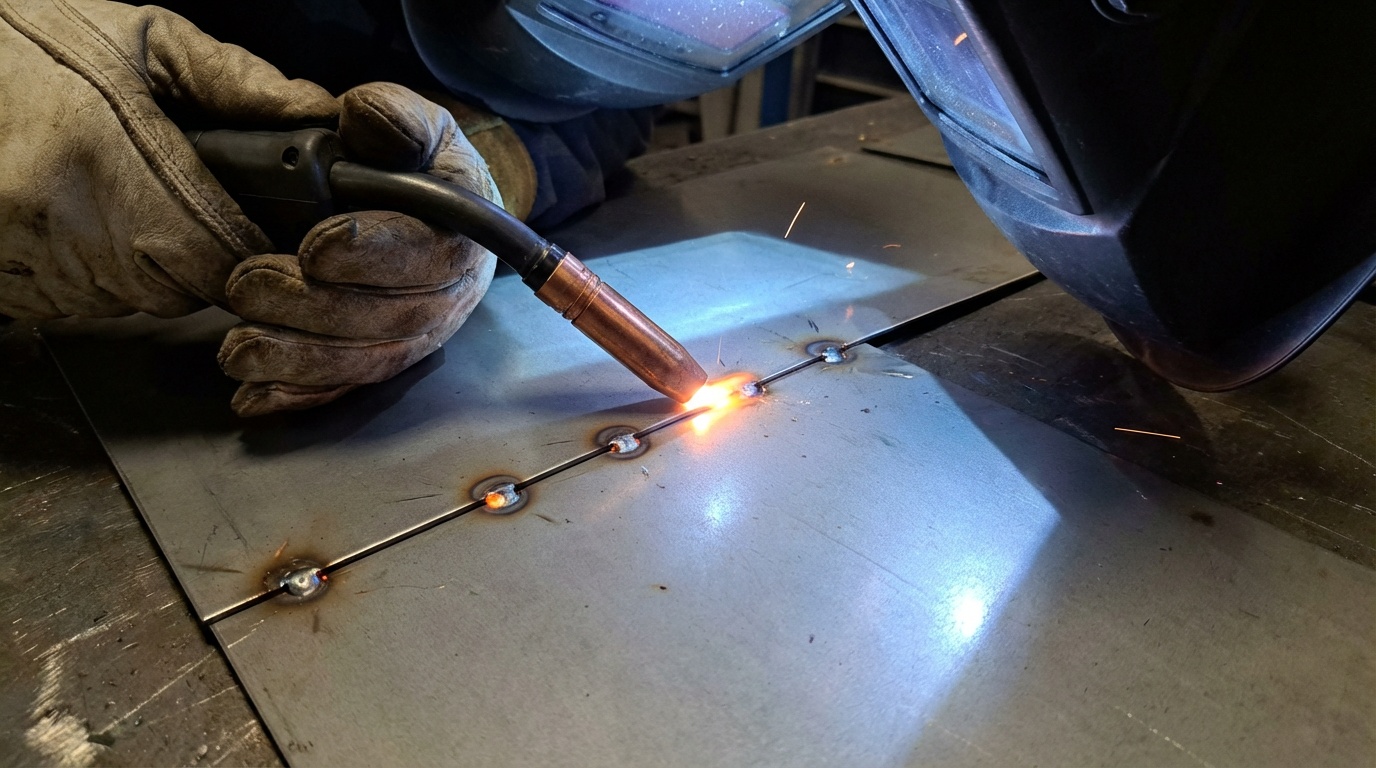
Tack First. Always.
Never try to run a continuous bead across raw sheet metal. It'll warp and blow through every time.
Tack the joint every 1 inch. Let each tack cool for 15–30 seconds before the next one. Hit it with compressed air or a wet rag if you're in a hurry.
Once everything's tacked, run short stitch welds between the tacks. Each stitch should be maybe ½ inch long. Then stop. Move. Do another.
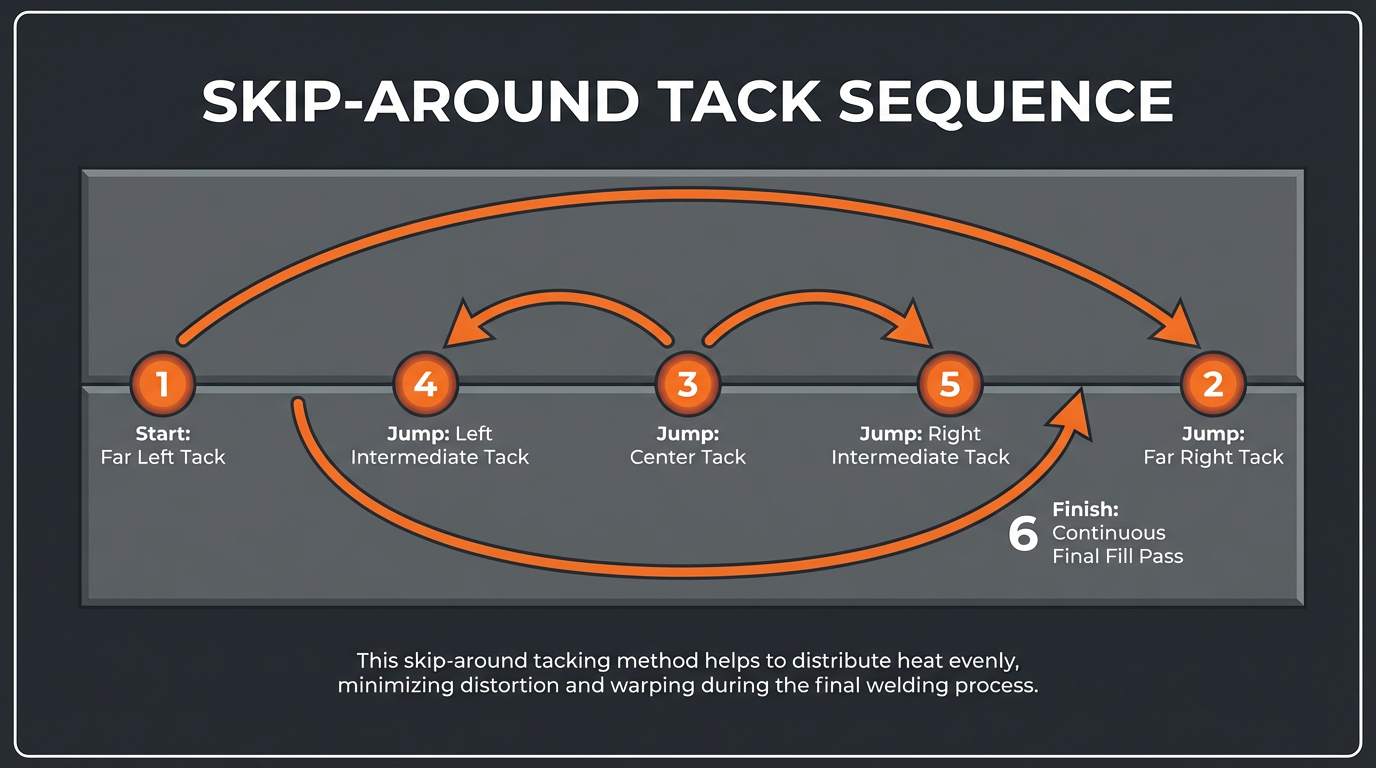
The Skip-Around Method
Here's what stops warping and blow-through at the same time: don't weld in order.
Do a stitch on the left end. Then one on the right end. Then the middle. Then between the middle and the left. Scatter the heat. Let each section cool while you're working somewhere else.
Most people weld left to right in a straight line and wonder why the panel looks like a potato chip afterward. Now you know.
Stickout and Angle Matter More Than You'd Guess
Keep your wire stickout short — around ¼ to ⅜ inch. Long stickout drops voltage at the puddle but adds resistance heat, which weirdly still burns thin metal.
Hold the gun at a 10–15 degree push angle. Push, don't drag. Pushing gives you less penetration, which is exactly what you want here.
Use a Backer if You Can
A copper backer behind the joint works like a heat sink. Copper won't stick to the weld and it pulls heat out fast. You can weld noticeably thinner metal with a backer than without one.
Aluminum angle works in a pinch too. Not as well as copper, but it's usually free.
Quick Gut Check Before You Start
Test on scrap. Every single time. Same thickness, same gas, same wire. Burn 5–10 tacks on scrap and adjust until the back side shows a faint heat halo and nothing more.
If the back looks like the surface of the sun, turn it down.
Once you get sheet metal dialed in, everything else feels easy. Thick plate is forgiving. Sheet is where you actually learn to control heat.
Join 30,000+ students learning to weld at home with my online course:
>>> Check out 1 Day Welder here
>>> Shop the 1 Day Welder Amazon Store
Talk soon,
Quinn "patched a quarter panel with seventeen tacks" Morrissette
P.S. If you're fixing rust on a car, clean the paint back at least 2 inches from your weld zone before you strike an arc. Paint fumes contaminate the puddle and you'll get porosity every time. 30 seconds with a flap disc fixes it. Skip that step and you'll be re-doing the whole repair next weekend.