How to Prep Metal for Welding: The Secret to Strong, Clean Welds
You can have the fanciest welder on the planet and perfect settings, but if your metal isn't clean, your welds will look like bird poop. Seriously. Most beginners jump straight to striking an arc, then wonder why their beads are full of porosity or just won't penetrate.
The truth is, 80% of a good weld happens you even pull the trigger. We're talking metal prep: cleaning, grinding, and fitting your pieces. Skip these steps and you're just making expensive scrap metal. Get them right, and you're halfway to a pro-level weld every time.
Cleanliness is King: Degrease and Descale
Your metal arrives from the supplier with all sorts of crap on it. Mill scale, rust, oil, grease, paint, even shipping labels. All of these contaminants will turn into gas bubbles in your weld, leading to porosity, lack of fusion, and a weak joint. You want a clean, bright metal surface.
Start with a degreaser. Simple green, acetone, or brake cleaner works wonders. Wipe down every surface you plan to weld, and a bit beyond. For heavy rust or thick mill scale; that dark, flaky layer on hot-rolled steel; you need more. Grind it off with a flap disc or a wire wheel. Don't be shy; get down to bare metal.
Get Your Edges Right: Beveling and Joint Design

For thicker materials, especially anything over 1/4 inch, you can't just slap two pieces together and expect full penetration. You need to prep the edges. This means beveling. A 30-degree bevel on each piece creates a "V" groove, allowing the filler metal to fully penetrate and fuse the joint from top to bottom.
Think about it: without a bevel, you're just laying a bead on the surface, like glue. It won't hold. Use an angle grinder with a grinding disc or a flap disc to create those bevels. On thinner material, say 1/8 inch, you might just need to knock off the sharp edge slightly; a "feather edge"; to get good fusion without blowing through.
Tight Fit-Up for Strong Welds
This is where many beginners get lazy. They leave massive gaps between their pieces, then wonder why they're burning through or their welds are concave and weak. A tight fit-up is crucial. The closer your pieces are, the less filler metal you need, and the stronger your joint will be.
Aim for gaps no wider than the thickness of a business card for most MIG or TIG work. If you have a larger gap, you can bridge it, but it takes more skill and often leads to weaker welds. Use clamps, magnets, or even strategically placed tacks to hold your pieces perfectly in place before you start laying down a full bead. Miller clamps or Bessey F-clamps are your friends here.
The Right Tools for the Job
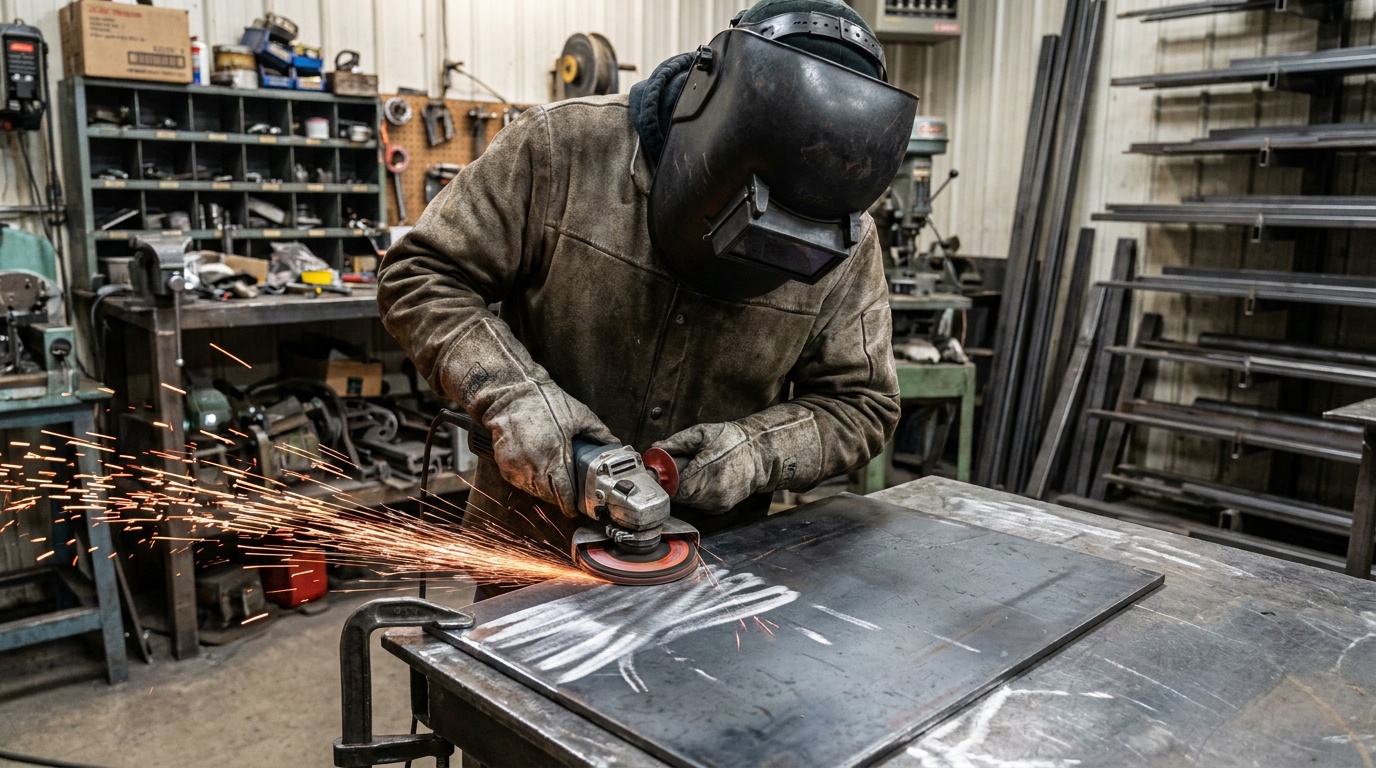
You wouldn't use a screwdriver to hammer a nail, right? Same goes for metal prep. Your primary weapon is an angle grinder. Get yourself a good 4.5-inch grinder, maybe a Makita or a Dewalt. Pair it with an assortment of discs.
For heavy material removal and beveling, a grinding disc or a zirconia alumina flap disc (60-80 grit) is your go-to. For cleaning up rust or mill scale without removing too much base metal, a wire wheel is excellent. For a smoother finish, or to blend welds, step up to a finer grit flap disc (120 grit). And always, wear eye protection and gloves when grinding. Sparks fly, metal bits go everywhere. Don't be a dummy.
Common Mistakes to Avoid
Skipping Degreasing: Hitting rusty metal with a wire wheel before degreasing just smears oil and grease deeper into the surface. Clean first, then grind.
Ignoring Mill Scale: That dark, flaky layer on hot-rolled steel is an insulator and a contaminant. It needs to go, or your arc will wander and your weld will be inconsistent.
Leaving Big Gaps: Trying to fill a 1/8-inch gap with a MIG welder set for 1/16-inch material is a recipe for blow-through and frustration. Take the extra minute to close the gap.
Using the Wrong Abrasive: Don't use a wire wheel that's been used on mild steel to clean aluminum. Cross-contamination is real, and it'll mess up your aluminum welds. Have dedicated tools for different metals.
Grinding Too Thin: Beveling is good, but don't grind your base metal down to a razor edge. You need enough material for the weld to fuse into.
Confidence in Every Weld
Metal prep isn't the glamorous part of welding, but it's the foundation. Take the time, do it right, and you'll see a massive difference in your weld quality, strength, and appearance. It's the secret sauce the pros use. Now go grab that grinder and make some sparks!
Quinn "always grinding" Morrissette
Join 30,000+ students learning to weld at home with my online course:
>>> Check out 1 Day Welder here
>>> Shop the 1 Day Welder Amazon Store