Strength Test for Home Welders
You just laid down a bead that looks like a stack of dimes. Sweet. But is it strong? Looks can be deceiving in welding, and a pretty bead can hide a weak joint.
You need to know if your welds will hold up. Not just for safety, but to build your confidence and actually learn what works. Forget expensive lab equipment — you can test your welds right in your garage.
The Truth About Ugly vs. Strong Welds
Here's a hard pill to swallow: sometimes a slightly uglier weld is stronger than a perfect-looking one. Why? Because penetration, fusion, and proper heat input are king. A gorgeous bead with no penetration is just decoration.
Testing your welds isn't about shaming your work. It's about learning. Every time you break a weld, you're getting a masterclass in what went right and, more importantly, what went wrong. Pay attention to the break, and you'll become a better welder faster than any YouTube tutorial.
The Hammer Test: Quick & Dirty
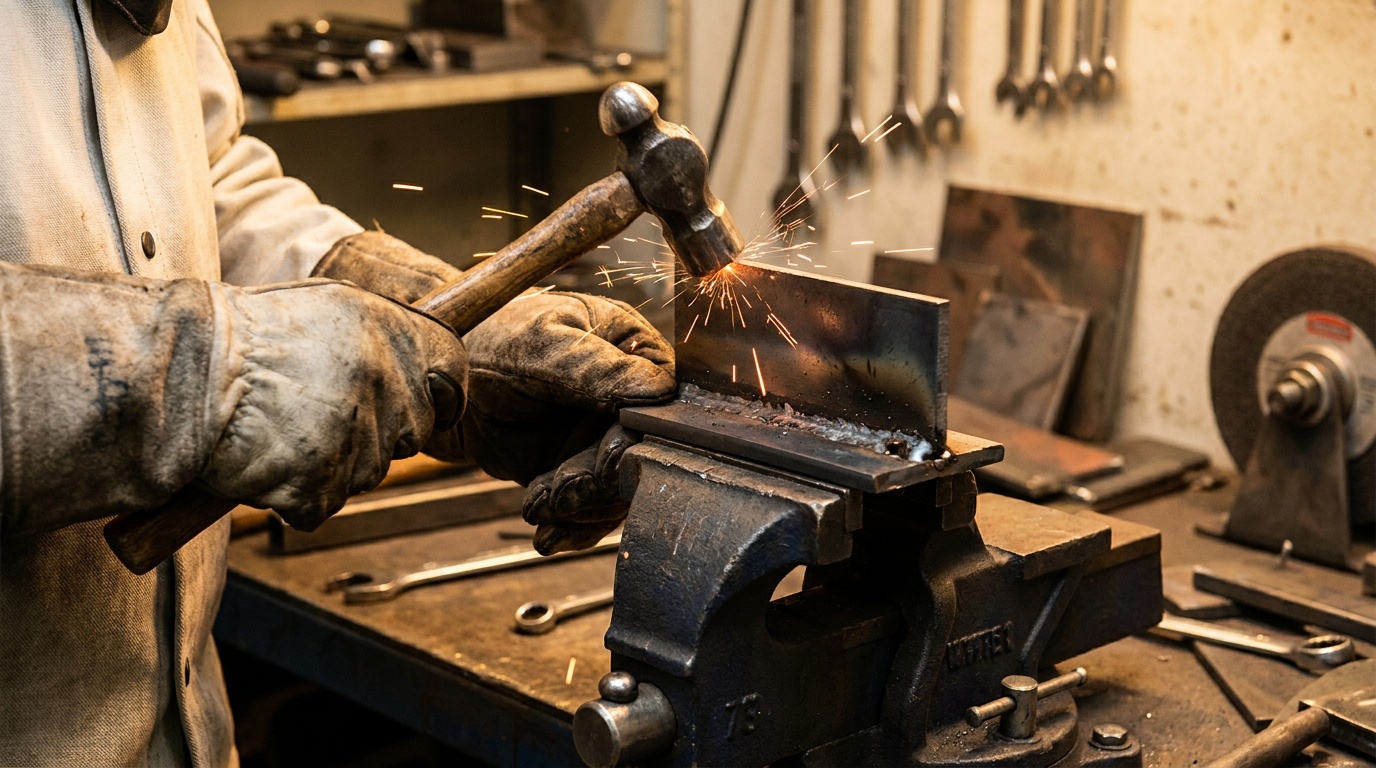
This is your simplest, fastest check. Grab a sample piece of metal you've welded – maybe a couple of scraps butt-welded together or a small lap joint. Secure one side in a sturdy vise, like a Wilton 63200. Then, take a heavy hammer – a 2lb ball-peen is perfect – and give that weld a solid whack. Or two. Or three.
A good weld will resist. It might bend, it might deform the base metal, but it shouldn't just pop apart at the weld line. If it fractures cleanly along the fusion line, you've got a problem. This test is great for a quick gut check on your settings and technique for a new material or joint.
The Bend Test: For Flat & Butt Joints
The bend test gives you a better look at the weld's ductility and fusion. Weld two pieces of 1/8" (3mm) mild steel together in a butt joint. Grind the top and bottom of the weld flush with the base metal. You want a smooth transition, no humps or valleys.
Clamp one end of the welded piece firmly in your vise. Now, grab the other end with a large pair of Vice Grips or another pair of strong pliers. Bend the piece over, slowly applying pressure. You're trying to bend the weld itself, either with the root or the cap on the outside of the bend.
A strong weld will bend significantly, maybe even 90 degrees or more, before showing cracks. If it snaps quickly or cracks appear immediately at the weld line, your fusion or penetration needs work. Try increasing your amperage or slowing your travel speed.
The T-Joint Break Test: Your Best Friend
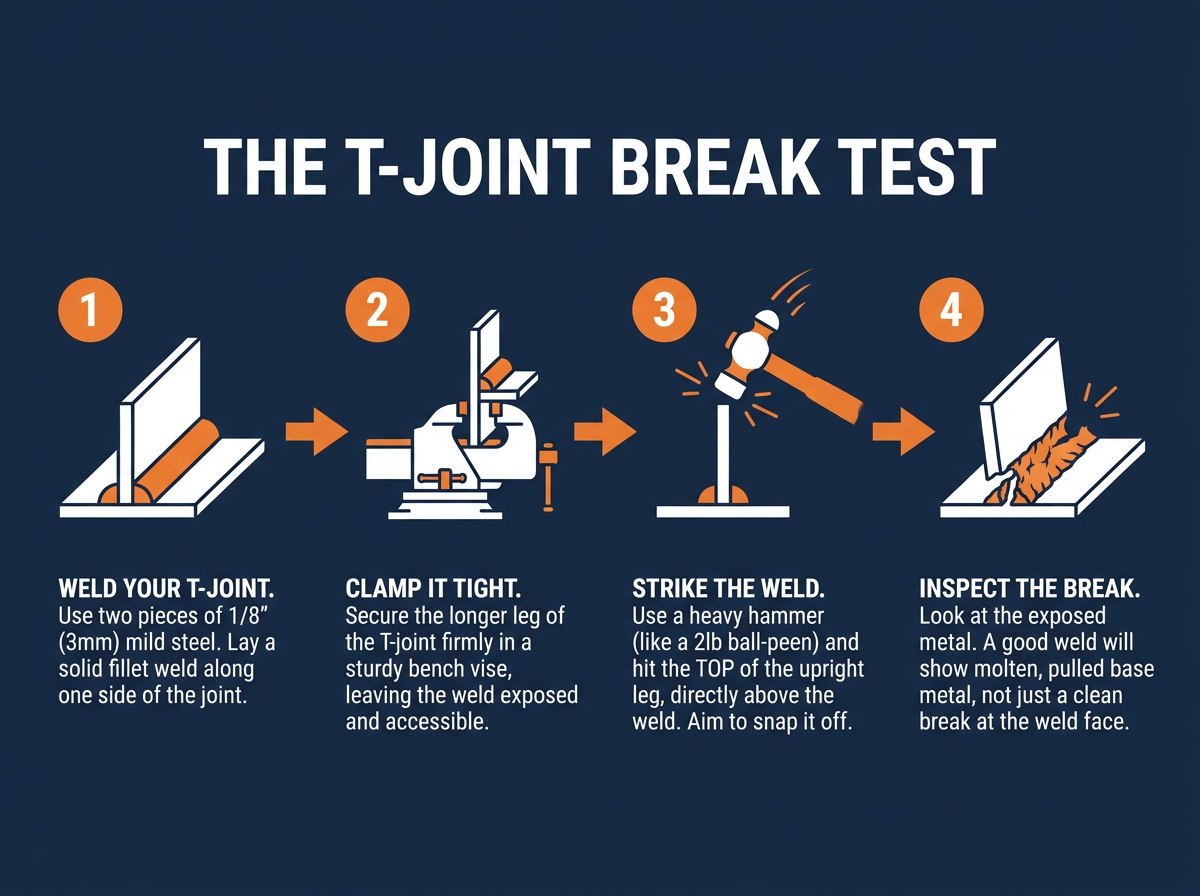
This is the gold standard for home destructive testing, especially for fillet welds. It's simple, effective, and shows you exactly what's happening inside your joint. You'll need two pieces of metal, preferably 1/8" (3mm) thick mild steel, to form a 'T'.
Weld a fillet bead along one side of the T-joint. Make sure it's a decent, full-sized weld, not just a tack. Once it's cooled, clamp the longer leg of the 'T' securely in your bench vise, leaving the upright leg sticking straight up. The weld should be exposed.
Now, grab your hammer again. Hit the very top of that upright leg, directly above the weld, with a forceful blow. You're trying to snap the upright leg off at the weld. A truly strong weld won't just break at the weld face. It'll pull chunks of the parent metal with it, or deform the base metal significantly before the weld gives way. If it breaks cleanly along the fusion line, you had poor penetration or cold lap.
Visual Inspection: The First Line of Defense
Before you even think about breaking anything, use your eyes. This is your first line of defense against bad welds. Look for consistent bead width, uniform ripple pattern, and good tie-in at the toes of the weld. Are there any visible cracks?
Check for undercut – a groove melted into the base metal next to the weld. Look for porosity – those tiny pinholes. Is there proper reinforcement without being excessively convex? These visual cues tell you a lot about your technique before you even strike it with a hammer.
Common Mistakes When Testing Welds
- Not Testing At All: The biggest mistake! You won't learn or build confidence if you don't know if your welds are actually strong.
- Testing Too Small or Thin Samples: A tiny piece of metal will break easily, giving you false negatives. Use at least 1/8" or 3/16" material for meaningful tests.
- Not Observing the Break: Don't just celebrate if it holds or curse if it breaks. Look at the fracture surface. Did it tear the base metal? Was it a clean break? That's where the real lessons are.
- Over-Grinding Test Pieces: For bend tests, grinding too much off the weld can weaken it unnaturally. Grind just enough to be flush, not to remove significant material.
Don't be afraid to break your welds. It's not a sign of failure; it's a sign you're serious about learning. Every busted joint is a lesson learned, making your next weld stronger and your skills sharper. Get out there, spark up, and break some steel.
Quinn "The Spark" Morrissette
Join 30,000+ students learning to weld at home with my online course:
>>> Check out 1 Day Welder here
>>> Shop the 1 Day Welder Amazon Store