Why Weld Prep Matters More Than You Think
You spent good money on a welder, you’ve got your technique dialed in, but your welds still look like a pigeon crapped on your project. The problem? You probably haven’t even struck an arc yet. Bad welds often start long before the electrode even touches the metal.
Most beginners jump straight to welding, ignoring the surface, the edges, and the fit-up. But if your metal isn't ready, no amount of perfect technique or fancy gear will save your weld from porosity, lack of fusion, or just plain ugliness. Think of it like building a house on a shaky foundation – it’s doomed to fail.
Clean Your Metal Like Your Life Depends On It
This isn't optional; it's fundamental. Every speck of rust, paint, oil, or mill scale is a contaminant waiting to ruin your weld. These impurities vaporize in the arc, causing porosity, inclusions, and a weak, brittle joint. You're literally welding trash into your metal if you skip this.
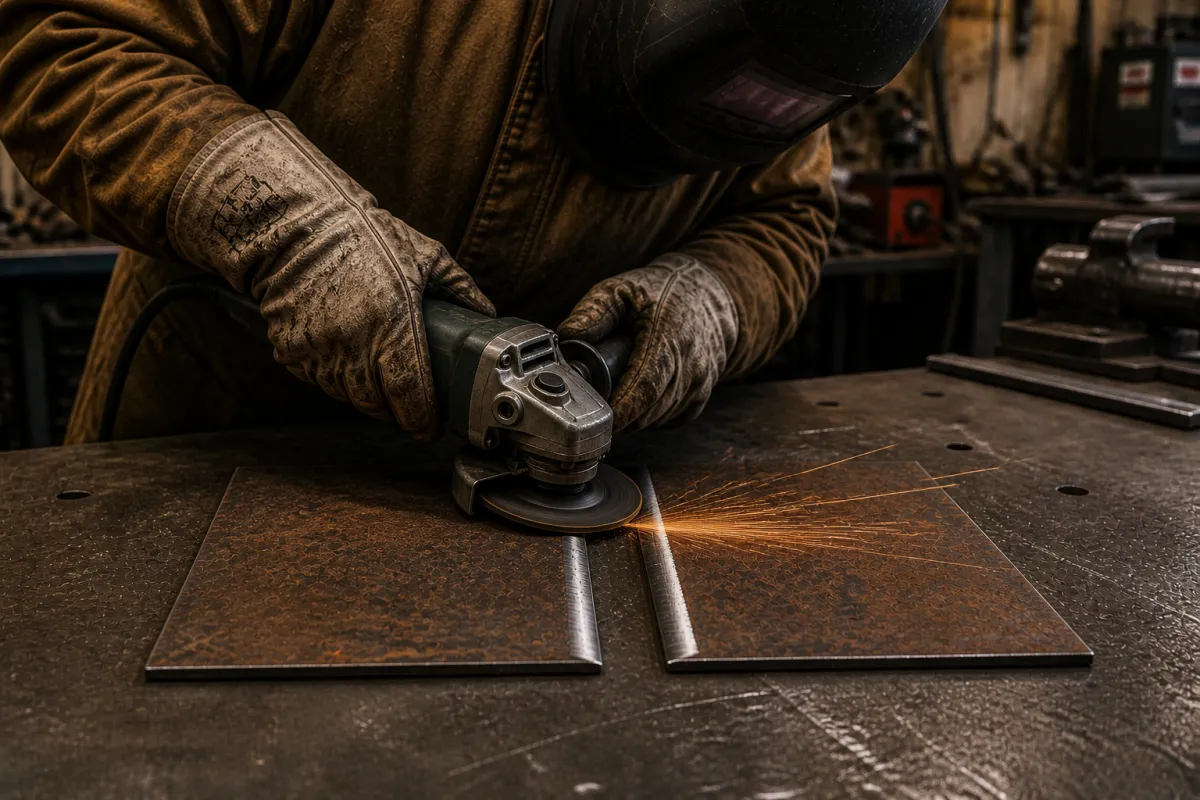
Grab an angle grinder with a flap disc or a wire wheel. For heavy rust or mill scale, a grinding disc might be necessary first. I always hit the joint and about an inch on either side. For oil or grease, wipe it down with acetone or a non-chlorinated brake cleaner. Make sure it completely evaporates before you even think about firing up your machine. Trust me, welding over paint isn't "saving time"; it's asking for a headache.
Beveling and Edge Prep: Don't Skimp on the Seam

For anything thicker than ¼ inch, flat edges just won't cut it for full penetration. You need to create a "valley" for your weld metal to fill. This is where beveling comes in. A 30-45 degree bevel on each piece creates a V-groove that allows you to get deep into the joint, ensuring strength.
Use your angle grinder with a grinding disc to create those bevels. You also need to consider the "root face" or "land" – that tiny flat section at the bottom of your bevels. Too small, and you'll blow through; too big, and you won't get full penetration. Aim for about 1/16 to 1/8 inch for most beginner projects. It’s a delicate balance that comes with practice.
Fit-Up Is Your Friend: Close the Gaps
Imagine trying to fill a Grand Canyon-sized gap with a little bit of weld metal. It's not going to work. Poor fit-up leads to burn-through, excessive warpage, and welds that look more like globs than beads. Your parts need to be as close as possible, with consistent gaps where required. Don’t try to bridge a canyon with a single bead.
Use clamps – lots of them. Bessey, Kreg, or even cheap Harbor Freight clamps are your best friends here. Clamp your pieces tight, then tack weld them in a few spots to hold everything square before you run your full beads. If you have a stubborn gap, sometimes a quick run with a grinding disc can help you get a tighter fit. A good fit-up saves you frustration and consumables.
Preheat for the Heavy Hitters (and Tricky Metals)
Preheating isn't just for exotic metals; it's crucial for thicker mild steel, cast iron (which we've talked about before), or high-carbon steels. Why? It slows down the cooling rate of the weld, preventing thermal shock and hydrogen-induced cracking. If you're welding something over ½ inch thick, or any kind of tool steel, think about preheating.
You can use a propane torch, an oxy-acetylene torch, or even an oven for smaller parts. Aim for around 250-400°F for general thick steel, checking with a temperature crayon. This gradual heating and cooling process makes for a much stronger, more ductile weld. Don't skip it if the material demands it, or you'll regret it when your weld cracks hours later.
Common Mistakes Beginners Make
Lazy Cleaning: Only wire brushing light surface rust. You need to get down to shiny, bare metal, especially in the joint.
Ignoring Mill Scale: That dark, flaky coating on new steel? It's bad news. It causes porosity and can trap contaminants. Grind it off.
Bad Fit-Up: Trying to bridge huge, inconsistent gaps. You'll waste gas, wire, and get a weak, ugly weld. Take the time to make parts fit.
Using Chlorinated Cleaners: Brake cleaner with chlorine is a big NO. When heated, it creates phosgene gas – deadly stuff. Stick to acetone or non-chlorinated alternatives.
No Bevel on Thick Material: Thinking a single pass on a ¾ inch plate will penetrate. It won't. Bevel, bevel, bevel for full fusion.
Prep work isn't the flashy part of welding. It's dirty, it's noisy, and it takes time. But it’s the bedrock of every strong, clean weld you'll ever lay down. Master this, and you'll wonder why your welds ever looked bad in the first place. Put in the grunt work upfront, and your welds will thank you for it.
Quinn "The Spark" Morrissette
Join 30,000+ students learning to weld at home with my online course:
>>> Check out 1 Day Welder here
>>> Shop the 1 Day Welder Amazon Store